
Internal Projects
What we call Internal projects are those that are never directly used by customers. The most common example of an Internal project is a common library that is shared by multiple End-User projects. As a result, there can be multiple different versions of an Internal project in production at any given time. Another key difference between End-User and Internal projects is that Internal projects do not go through a formalized testing process like UAT. In some ways the Internal pattern is simpler than the End-User pattern, but in other ways it's more complex.
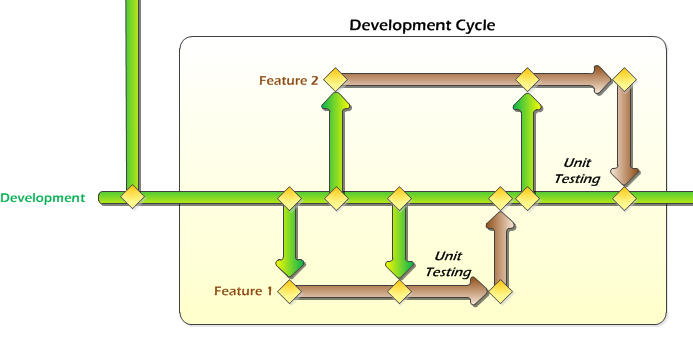
The Internal branching pattern looks like this (click for a larger view):

This pattern only has two main branches, Development and Bug Fix. Development is the main branch where all day-to-day coding occurs. Bug Fix is used for coding bug fixes to released code, and also as a staging ground for production releases.
The first step is to create the folder and branching structure. This is done just like in Part III, except for the obvious changes in the number of branches. It should look like this when done:
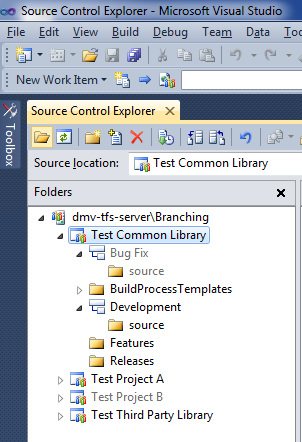
The branching hierarchy is quite simple, like this:

- Development Cycle
- Major Release
- Incremental Release of the Latest Version (bug fix to the latest released version)
- Incremental Release of an Old Version (bug fix to an older released version)

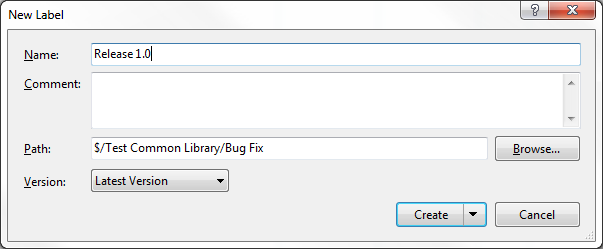
The biggest difference here compared to what we've done before is the presence of the label. The label comes in handy for making bug fixes to older releases, as we'll see in a little bit. To apply the label, right-click on the Bug Fix branch and choose "Apply Label...":
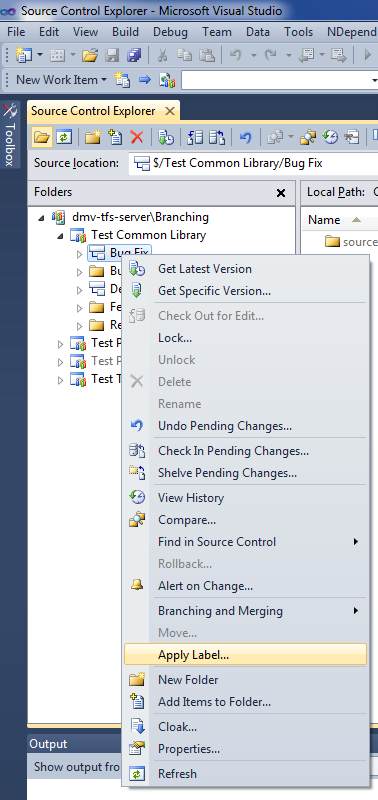
After that, give the label a meaningful name, like "Release 1.0":
Finally, create a read-only branch for the release, just like before. That's all there is to it for a Major Release.
An Incremental Release is similar, except the bug fix coding is done in the Bug Fix branch, and not in the Development branch. And just like with the Major Release, don't forget to label the code in the Bug Fix branch.

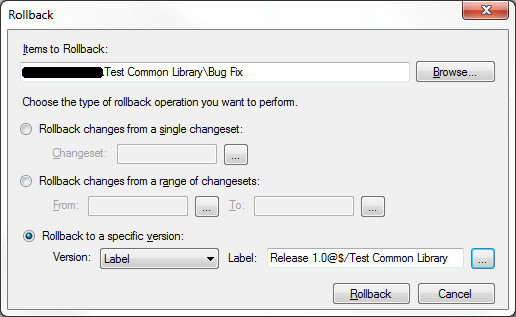
The only other thing left is an Incremental Release, and this is where we'll finally make use of the labels we've been creating. So far up to this point, we've released version 1.0 and a subsequent version 1.1, which contained a bug fix to 1.0. Let's say that now we have a bug in 1.0 that needs to be fixed, but we don't want that fix to be incorporated into 1.1. This is how you do it.

First, rollback the code in the Bug Fix branch to Label 1.0. Do this by right-clicking on the Bug Fix branch, and selecting "Rollback..."
Then make sure you choose the correct label in the correct project (by default Visual Studio searches labels in all projects, not just the current one).
Once this is done, all the code in the Bug Fix branch has been reset back to the Release 1.0 state. At this point, follow the same procedures as a normal Incremental Release - make your bug fix code changes, test them, and release them into production as Release 1.0.1. Also, merge your changes back down to the Development branch if you want - this step is optional. Note that Development contains 1.1 (or possibly later, unreleased) code. If you want this bug fix incorporated into those version, merge your changes down to Development. For example, if you didn't want this bug fix in 1.1 for some reason, but do want it to appear in a future 2.0 release, go ahead and merge. If you don't, and this bug fix is solely intended for Release 1.0, then don't merge your changes down to Development.
The final step is to rollback the code in the Bug Fix branch (which currently contains 1.0.1) to 1.1. This will ensure that the Bug Fix branch is always left in the state containing the latest released code. Doing this will simplify future releases, both Major and Incremental.
That completes an overview of all the major tasks involved with Internal projects. In the next part, I'll finish up with explaining how to share these common Internal projects across multiple End-User projects.
Here's a slideshow that covers the information in this article:
Great post, but I have a question about the Internal pattern. We have an implementation of your pattern for a common library, and we're currently on version 1.4.
ReplyDeleteNow, we're adding features to the library, so that implies a major release (so, version 2.0... the first major release since 1.0). We've developed the feature in the feature branch, and now we're trying to merge from the Feature Branch to the DEV branch (per the pattern).
But TFS is giving a warning, saying that the dlls in the DEV BRANCH\Deployment folder are locked by NT AUTHORITY\NETWORK SERVICE.
Any ideas how to perform the merge for a second major release? Could this possibly be related to the fact that the releases were marked as read-only?
I'm not completely sure without looking at it, but the NETWORK SERVICE user could be the one used for automated builds in Team Build. Check to see if the DLL's are checked out by anyone or not, and if so try to trace back when and why through the timestamps. I don't think the release being marked read-only would affect this, since that's an entirely separate branch.
ReplyDeleteThank yoou for being you
ReplyDelete